Brass Threaded Inserts may look Simple. A small piece of brass metal with inside female threads and a rough knurling outer shell. Every time you build a plastic part, you need to screw it more than once. Anyone who has tried driving fasteners directly into ABS and Nylon knows what happens. First time cycle is tight, second loosens, third pulls the threads clean out. Plastic does not have the identity to hold its own torque. So here comes the brass insert and solves the issue. They will give you repeatable fastening, higher pull-out strength, and assembly without destroying the housing.
We have used them in consumer electronics, automotive under-hood clips, and even in medical enclosures. They are very precise, not exotic. When you pick the wrong style and hole size, you crack.
This guide pulls together what actually matters: types, applications, installation methods, and mistakes you avoid
What makes a brass threaded insert different
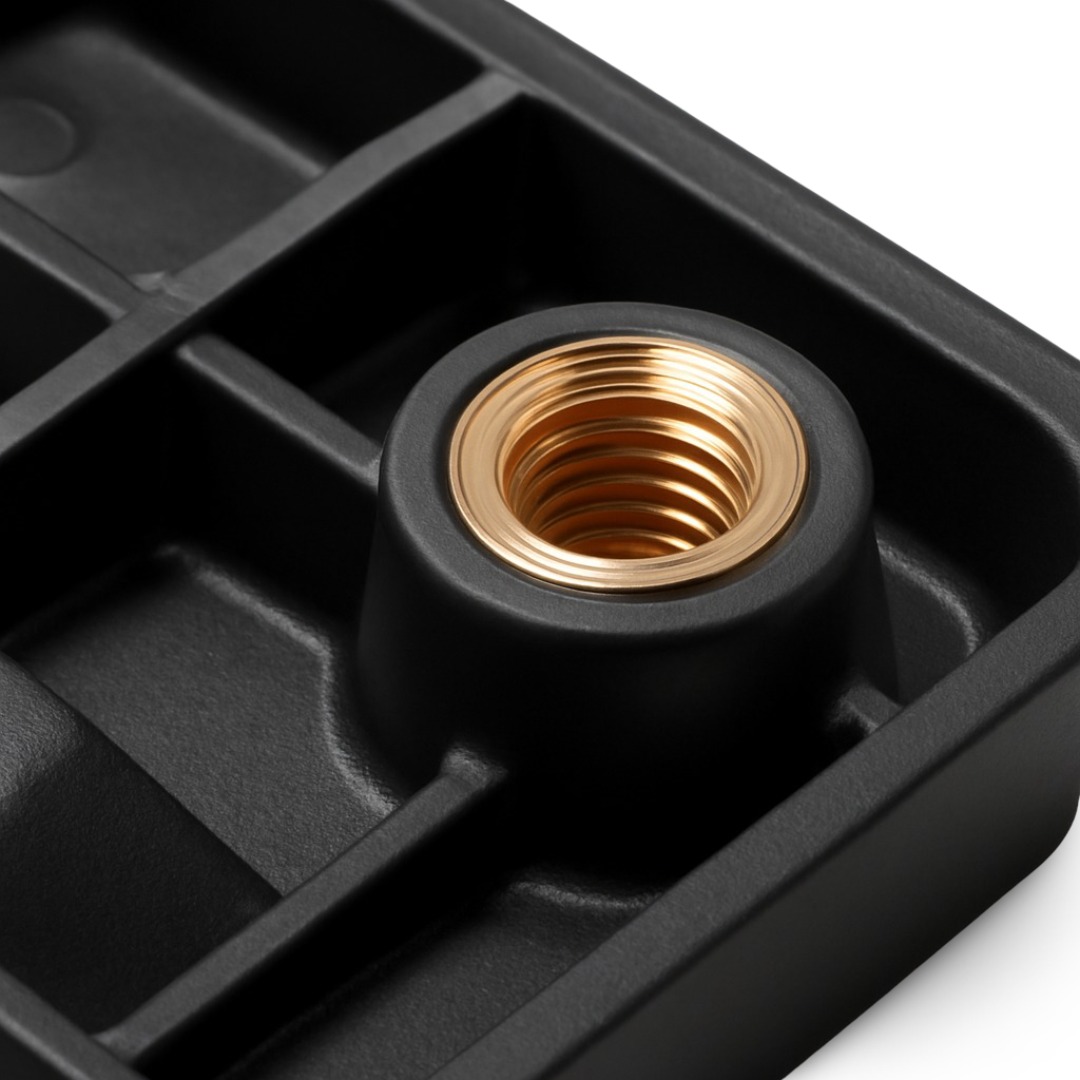
At the core, it is a sleeve with an internal thread, for example, M2, M3, M4, etc. The outside surface is rough, not smooth. Always knurling rings, for grip and bite into plastic. The reason behind it is that if it were smooth, then the torque from a screw would spin it out on the first drive.
Why Brass, not other metals like aluminum or steel? Because Brass machines clean, hold tolerances, and take knurls well. Stainless steel is an option, but it is costly, very hard to cut, and slow in machining. Carbon steel rusts in humid conditions. Especially if your products ship to Asia or Europe. Aluminum is soft and weak, often stripping threads under load; in such cases, choosing a professional aluminum CNC machining service for your metal housings is a more durable alternative.
And brass have balance of machinability, strength, and corrosion resistance. It is soft enough to press into ABS but strong enough to hold a torque load.
Common Types of brass threaded inserts
I break them down by how they go into the plastic.
Heat-set inserts
You just have to drop the insert into a pilot hole, and then press it in with a heated tip. As the insert goes in, the knurls melt the surrounding plastic and push it aside. When plastic is cool down. It will solid again and locks the insert in place. This method works especially well with thermoplastics like ABS, Nylon, And PC.
We mostly use heat-set inserts in electronics housings where wall thickness is limited and high-level precision CNC machining is required to maintain structural integrity. One thing you have to be careful is , if you overheat the part, then you can bubble or deform surface. So that’s why tight temperature control is key here.
Ultrasonic inserts
The ultrasonic method is similar. Instead of heat, it used high-frequency vibration from an ultrasonic horn to melt the plastic around the insert. It is much faster if you have the right equipment. On high-volume run, you can install hundreds of inserts per hour. And it supports precision and repeatable depth.
One thing you have to watch is that the horn face needs to be perfectly flat and clean. Otherwise, the insert can tilt during installation. And it will create alignment issues down the line.
Press-fit inserts
Press-fit inserts rely on a tight interference fit. No heat involved. You have to make a hole just slightly smaller than the insert, then press it in cold. This method is best for softer plastics like PP and HDPE.
We used it in consumer packaging where the strength is not a critical part, but speed is. It is not as strong as heat-set inserts, since the plastic doesn’t flow into the knurls, but they are fast and efficient when cycle time is the priority.
Mold-in inserts
Mold-in inserts are placed directly into the mold before injection. When the plastic is injected, it flows around the insert, fully encapsulating it. This creates the strongest mechanical lock, since the plastic surrounds the entire geometry.
Downside is higher mold complexity. Risk of misplacing inserts during setup, and also slow down the cycle time if you load manfully. For automotive housings this is best method.
Materials and finishes, corrosion and conductivity notes
IS 319 is a standard free-cutting brass grade that works well for most parts. Nickel plating gives you resistance to wear and adds corrosion resistance. Tin plating helps the solderability. Other like zinc, may flake and reduce conductivity. If you need a reliable ground path, avoid nonconductive coatings and ensure your assembly is compatible with high-conductivity components like a copper neutral bar for optimal electrical performance.
If parts travel to coastal climates, then we give you corrosion testing. Brass can dezincify in aggressive chemistries. If that matters to you, then move to a more suitable alloy or plated option.
Matching Inserts to Plastic Type
Thermoplastics can melt and flow, so you can reshape them with heat. Thermosets don’t melt, so they need different methods.
Nylon 6/6 and Nylon blends
Nylon are tough and flexible. Ultrasonic and Heat-set both methods work very well. For better result use shorter heating time to avoid burning. Glass-filled versions are more abrasive.
ABS
ABS is soft and easy to work. You can use press-fit and heat-set. But Be you have to careful about surface marks and sinking around the insert.
PC and PC blends
These melt at higher temperatures. For ultrasonic insertion work fast and you can use heat-set at a higher temperature with controlled tips
PBT, PET, POM
Check with the material supplier quality first. Some of these plastics can crystallize and burn when heated.
Thermosets
Use with press-fit, self-tapping, and mold-in inserts. Heat-set won’t work because these plastics don’t melt again.
Glass-filled resins
Use inserts with a more aggressive knurl and make sure pilot holes are precise. These plastics can wear down inserts during installation, but not during regular use.
Design Basics and DFM Tips for Inserts
The biggest problem isn’t usually the insert it’s the hole you put it in. There are many engineering drawings where people copy catalog hole sizes without considering plastic shrinkage, an essential factor when designing CNC parts for large-scale production. Even being 0.1 mm too small can crack the boss. The right design can prevent 90% of insert issues before you ever start assembly.
Tips for Better Insert Design
Pilot Hole
Start with the insert my recommendation.
For press-fit inserts, aim for a tight fit (about 0.05 to 0.15 mm smaller than the insert), depending on the plastic and insert size.
For heat-set inserts, give it a little room or a snug fit , just enough so the plastic can flow into the insert’s knurls when heated.
Boss Height
Make the boss at least 1.5 to 2 times as tall as the insert length (above the mating surface). If the boss is too short, the insert might come loose over time.
Boss Wall Thickness
The wall should be at least as thick as the inner diameter of the insert - ideally 1.2 times thicker. Thin walls tend to crack when you press or heat the insert in.
Chamfer
Add a 15-30 lead-in chamfer at the top of the hole. This helps guide the insert in and reduces stress during installation.
Draft Angle
Keep draft (the taper of the walls) as small as possible if you’re installing the insert after molding. A big draft helps with part ejection but can cause the insert to tilt. If your draft angle is more than 1°, use a fixture to hold the insert straight.
Insert Location
Don’t put inserts too close to parting lines, thin ribs, or sharp corners. If the insert needs to handle torque over 1.5 Nm, add support ribs under the boss.
Tolerances Matter
Things like molding shrink, cooling rate, and glass fill can all affect hole size. Use actual molded parts to test and fine-tune your pilot hole sizes. Don’t trust CAD hole sizes alone.
Inspection and testing
Pull-out test
Clamp the insert. Pull axially at 25 mm per minute. Record the peak load.
Torque test
Tighten the screw to the spec. Apply reverse torque until the thread strips or the insert spins. Record the failure torque.
Visual checks
Look for cracks. Look for sink marks. Look for excess flash. Check alignment and insert tilt.
Sampling plan
You have to test first article every batch. Pilot production: test 5 to 10 pieces per shift. Production: follow AQL 1.5/4.0 or your standard. Increase sampling after any process change.
Common failure modes and fixes
Boss cracking
If boss cracks then increase wall thickness. Add a fillet and slow the press. Or switch to heat-set.
Insert spins
Insert spins under torque then tighten pilot tolerance. Use deeper knurls or helical inserts. Stiffen the boss.
Pull-out
Insert pulls out under load then use a longer insert. Change to mold-in. Try a helical style.
Thread stripping
Screw strips the thread. Lower the screw torque. Use a longer insert. Use a larger screw.
Excessive melt or burn
Plastic burns or bubbles. Lower the heat-set tip temperature. Shorten dwell time. Try ultrasonic with tuned amplitude.
Troubleshooting quick checklist
1.Check resin grade and glass fill.
2.Measure pilot hole diameters on molded parts.
3.Confirm boss thickness and support ribs.
4.Validate insertion temperature and time with a thermocouple on the first article.
5.Run pullout and torque tests.
6.If inserts spin, try deeper knurls, a longer insert, or mold-in.
Document the fix. Revalidate with at least 10 samples.
Cost, lead time, and sourcing considerations
You can stock brass insert that comes in standard lengths and diameters. You can order small batch for testing. When your project requires a custom insert or extremely tight tolerances, partnering with a reliable contract manufacturing provider can help manage lead times and ensure consistency.
Sourcing notes:
- Order sample or small batch for better idea then go for large volume order.
- Request material certificates and testing report when needs.
- Check shipping cost, duty and assembly cost at your end,
Where they get used & Application
Electronics housings: laptops, routers, 3d printer, handheld devices.
Automotive: used in dashboards, under-hood connectors, and clips, requiring the same level of durability as brass brake line fittings in hydraulic systems..
Medical devices: casings where service requires disassembly.
Consumer goods: furniture brackets, appliances, toys.
Markets in the USA, Europe, and Asia rely on them for the same reason, with a significant demand for high-quality brass threaded inserts UK specifically for the British manufacturing sector.
Final word
Brass threaded inserts are small but break plastic assemblies. Get the type wrong, you waste labor. If you get the boss wrong, you scrap molded parts. Done right, they turn plastic into a serviceable, durable fastening system. If you are in design or production and need consistent supply, the next step is not another guide. It is running trials with the inserts in your own material.
Request a Free Quote for brass threaded inserts sized to your drawings. Our manufacturing process follows strict global standards, you can verify our quality through our ISO Certification and ROHS Compliance documentation.